Textiles and Clothing by Kate Heintz Watson (good books for 7th graders txt) 📕
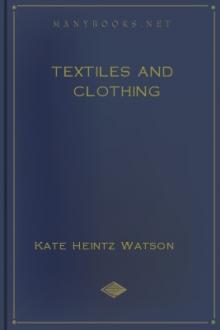
[Illustration: FLY SHUTTLE HAND LOOM.
The Pulling of the Reed Automatically Throws the Shuttle Back and Forth and Works the Harness, Making a Shed at the Proper Time.]
[Sidenote: Primitive Fabrics]
No textiles of primitive people were ever woven in pieces or bolts of yards and yards in length to be cut into garments. The cloth was made of the size and shape to serve the particular purpose for which it was designed. The mat, robe, or blanket had tribal outlines and proportions and was made according to the materials and the use of common forms that prevailed among the tribes. The designs were alway
Read free book «Textiles and Clothing by Kate Heintz Watson (good books for 7th graders txt) 📕» - read online or download for free at americanlibrarybooks.com
- Author: Kate Heintz Watson
- Performer: -
Read book online «Textiles and Clothing by Kate Heintz Watson (good books for 7th graders txt) 📕». Author - Kate Heintz Watson
A bias or diagonal cut and a three-cornered tear are the most difficult to repair. If the place is badly pulled and frayed, a piece of the same material should be basted on the wrong side of the material and darned in even stitches. Always darning parallel with the warp threads and the woof threads. In the diagonal tear, as the threads are cut diagonally, to prevent drawing apart, the darning threads must cross each other.
The stitches around any darn should not end in a stiff even line; this makes a hard edge which does not wear and is unsightly, and uncomfortable if on underwear.
The three-cornered tear may be darned in two ways. Begin by darning diagonally through the center, darning back and forth towards the end of the tear until one-half has been finished; then begin at the center and work in the opposite direction. At the corner, the stitches should form the shape of a fan. The other method, which is the stronger, is done by darning a square in the angle, first with the warp threads, then with the woof threads and finishing each end across the tear.
Stocking darning may be done on the right side. Begin by picking up the stitches and drawing the edges together. This should always be done in any kind of stocking darning, but not so close as to make a wrinkle.
In knees and heels of stockings, or knitted underwear, a piece of net large enough to extend beyond the thin part should be basted carefully; then darn down the outer edges of the net and finally the hole or thin place. This makes a strong, neat piece of mending. If the hole is large, the net may be covered with the chain stitch, thus imitating the knitting stitch. This should be done on the right side of the garment.
If the hole is to be filled in with the interlaced stitches, draw the edges together, darn beyond the thin places lengthwise of the knitted garment, making each line of stitches longer until the center of the hole is reached, then decrease in the same manner, making a diamond in shape. Darn across the hole in the same way, taking up every alternate stitch as in weaving. Leave a tiny loop at the end of each row of darning, so that the threads will not draw.
Darning, satisfactory for some purposes, may be done quickly on a double thread sewing machine. It is best done in an embroidery ring, first drawing the edges together. Loosen the tension on the presser foot, use fine thread with light tension. Sew back and forth, first along the warp threads and then at right angles along the woof threads. The machine will be sewing backwards part of the time, but if the pressure is light, there will be no difficulty. For large holes, paper may be placed underneath.
MITERING EMBROIDERY OR LACEThe mitering of lace or embroidery is often necessary in making collars and in finishing corners. Before applying, plan carefully and select a scallop or portion of the embroidery which will produce the best effects when finished. This can be accomplished by folding the embroidery over at various portions of the pattern until a suitable point is found. Fold over at right angles and mark along the line to be mitered. The triangle may now be cut, but an extra width must always be allowed for the seam, as there is frequently a slight unevenness and one side may have to be held a little full or stretched to make a perfect match. The mitered seam is over-sewed.
After the corner is properly made, cut away the cloth of the embroidery, allowing only enough for an inturned seam on the edge. This seam may be stitched on the machine on both edges, or oversewed to the goods, or the embroidery may be securely sewed on the plain part, after which the underlying cloth may be cut away. This will make an almost perfect corner.
Lace may be matched and mitered in a similar way.
MATCHING AND JOINING LACEIn joining lace, avoid a seam if possible. Select portions of the design that will match, placing one pattern of the same design over the other. Cut away a portion of the thick part of the pattern underneath and hem the edges and inner part of the design down with fine thread.
Smyrna or Torchon lace is more difficult to hem or join when very open or very fine. A small, felled seam is better than lapping and trying to match the pattern.
Embroidery can be matched in the same way. Never let two heavy designs lap over each other. The one on the wrong side should be cut out and the edge sewed securely to the upper part of the design.
The plain material above the embroidery can be joined by a lapped seam, turning first the right side and then the wrong side and hemming on both sides of the seam.
MACHINE SEWINGThe sewing machine has taken away much of the drudgery of home sewing, but its use does not lessen the need of skill in hand work. No machine can finish ends of belts, collars, sew on trimmings, fastenings, and like work and the finish has much to do with the general appearance of a garment.
All the prominent makes of sewing machines were invented in the decade following Howe's patent in 1846. The two chief types of machines are the lock stitch, using double thread, and the chain or loop stitch, using a single thread. Whatever the make of machine it should be run in accordance with the rules accompanying it. The worker should familiarize herself with the directions for setting and threading the needle, winding the bobbin, regulating the tension and the stitch and all other technicalities of the particular machine she has to operate. Agencies of the various machines usually have skilled workers to give instruction to beginners. While it is not always an economy of time to use the attachments for hemming, tucking, etc., unless much work is to be done, it is worth while to know how to use them if desired. As much or more skill is required for neat machine work as for hand sewing. Results will not be satisfactory without careful basting.
The machine should be kept well oiled, free from dust and gum and it should he run evenly. In case it becomes "gummed" a drop of kerosene on the parts that have been oiled will cut the gum. Remove the shuttle and run the machine rapidly for a moment, then wipe off all the kerosene and oil the machine carefully with good machine oil—only the best should be used. A machine should always be wiped thoroughly before any work is placed upon it.
As in hand sewing, needles and thread should be selected with care. A blunt or bent needle should never be used, it should have a fine sharp point and the eye should be sufficiently large to carry the thread easily. The needle and thread should be suitable for the material to be sewed. Glazed thread should never be used in a machine. The best quality of thread and silk should be purchased but only enough for immediate use, as it loses strength with age, chiefly because of the action of the dyes and chemicals. Even white thread may become "tender" from the chemicals used in bleaching it. Sewing silk and cotton should be kept in a closed box to exclude the light and air.
For sewing cotton or linen the best cotton thread should be used. Woolen, silk, and velvet should be stitched with the best machine silk. The thread should match the material in color. Cotton thread fades or loses its brightness when exposed to the light, therefore for stitching that will show it is always better to use silk. The thread on the bobbin should be wound evenly and carefully to insure an even stitch and the tension of both threads should be equal, otherwise the stitch will not be perfect. As a lock stitch machine requires two threads while in hand sewing only one is used, the two need not be as coarse as the single thread. For ordinary home sewing, underwear, thin gowns and the like, No. 70 to No. 100 will be found satisfactory. Finer thread may be used when the materials demand it, but no coarser than No. 50 should be used in the machine and this only with the coarsest material.
Much time may be saved in fastening the threads at the ends of tucks, hems on sheets, towels, etc., by careful manipulation of the machine. For example, on sheets begin to stitch along the hem at the selvage, or if the end of the hem is over-sewed, begin an inch from the edge and stitch the hem towards the selvage, then lift the presser-foot so as to turn the work, and retrace the bit of stitching, continuing across the whole hem. When the end is reached, release the presser-foot, turn the work, and stitch back for an inch or more in the same line, as was done at the beginning of the hem. By this method the threads are fastened much more easily and quickly than by drawing them through on to the wrong side and tying or sewing them by hand and, of course, it is more satisfactory than the "shop" way of cutting them off short. Tucks or seams may be fastened in the same way. If fine thread is used the double stitching at the ends is hardly noticeable.
When stitching a seam having one bias and one straight side, let the bias side come next to the feed, that is, on the underside. This is especially important in thin materials. If the material is very sheer, strips of soft paper—newspaper will answer for ordinary purposes—should be sewed in the seam. This will insure a seam free from puckers and when finished the paper can be pulled away easily.
In sewing gathers on a band they should also come next the "feed," as it takes up the side next to it a little faster than the upper side. When the bias, or cross-way side of the seam, or gathers are next to the "feed" the material runs along smoothly, but if the straight side is towards it there is apt to be a pucker.
Stitching can be done more easily on the right of the presser foot with the bulk of the material lying to the left. The tendency of the "feed" or teeth is to crowd the work off the edge as well as forward and the stitching may be guided better on the right side.
All straight seams should be stretched to the full extent of their straight edge in stitching, as the work passes under the presser foot.
When a large amount of machine sewing is to be done—such as household linen, sheets, pillow cases and underwear—it is a good plan to do all the basting and hand work first and keep the machine stitching for a rainy or a damp day, as the thread is then less apt to break. A current of air or a breeze from


Comments (0)